


华为荣耀8高配版拆机图解
在拍照过程中,我们感受到了这款手机美中不足的地方。在尝试多次对焦、频繁拍照时(大约在开启拍照功能10分钟左右后),其发热量有些惊人,机身顶部金属中框有些烫手,看来在拍照的硬件方面,还需要优化。下面我们对荣耀8高配版进行拆解!
荣耀8的SIM卡卡托进行了防呆处理,能够有效防止由于SIM卡防反造成的卡槽损坏。
荣耀8的SIM卡卡托进行了防呆处理,能够有效防止由于SIM卡防反造成的卡槽损坏。
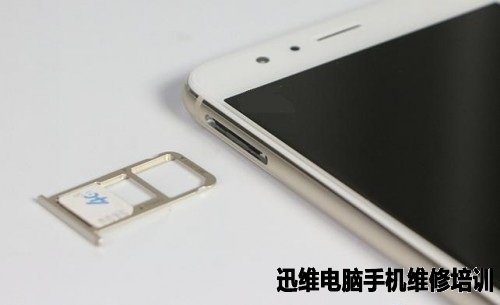
图1 荣耀8高配版拆机
荣耀8采用了双玻璃的设计,玻璃后盖与中框通过大量胶水连接。
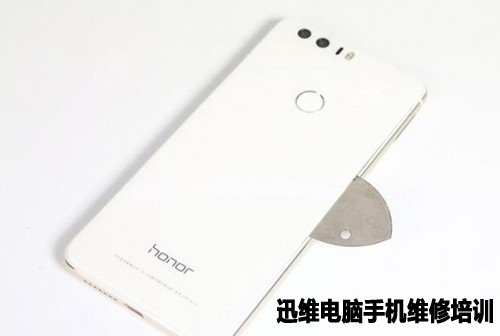
图2 荣耀8高配版拆机
在机身背面中,同时拥有指纹识别功能以及智灵键功能的按钮模块,通过软性印刷电路板与主板相连接。
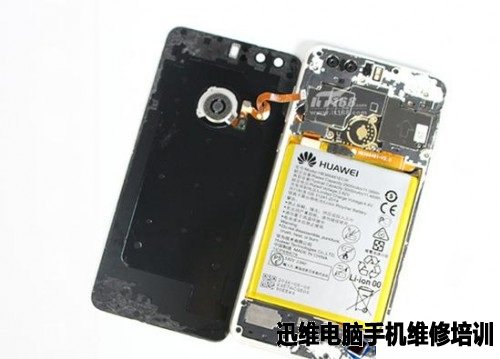
图3 荣耀8高配版拆机
主板上所有的排线上方都有金属片进行固定,保证了整机良好的稳定性。
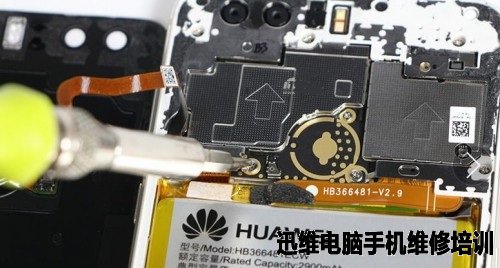
图4 荣耀8高配版拆机
荣耀8采用了一整块玻璃背板,仅在中间的指纹识别按键以及闪光灯处进行了开孔,另外在玻璃背板上也覆盖了大面积的石墨散热贴纸。
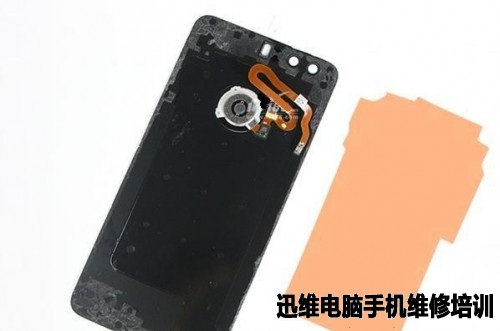
图5 荣耀8高配版拆机
兼具智灵键的指纹识别模块特写:
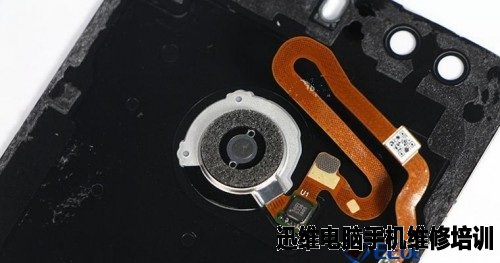
图6 荣耀8高配版拆机
荣耀8内部采用了三段式结构设计,将更多的空间留给了电池仓。

图7 荣耀8高配版拆机
此外荣耀8在玻璃背板与金属中框之间加入了一层注塑中框,主要目的是考虑到玻璃的易碎性,注塑带能够起到缓冲的作用,降低直接对玻璃后盖造成的冲击。
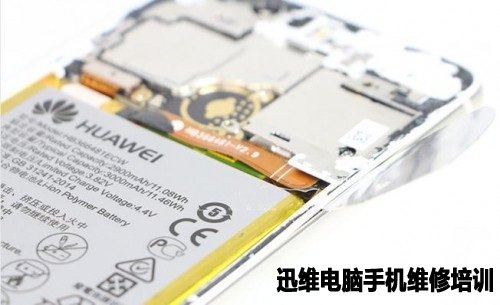
图8 荣耀8高配版拆机
注塑缓冲带中与主板上对应的部件区域均预留出了相应的位置,同时做工上十分平滑没有毛刺。
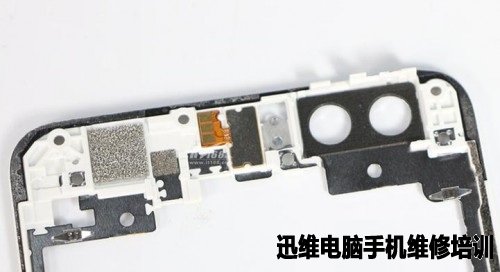
图9 荣耀8高配版拆机
回到机身方面,荣耀8的电池采用无痕胶进行固定,由于我手中这台荣耀8还需要进行详细评测,所以并没有对电池进行详细拆解。
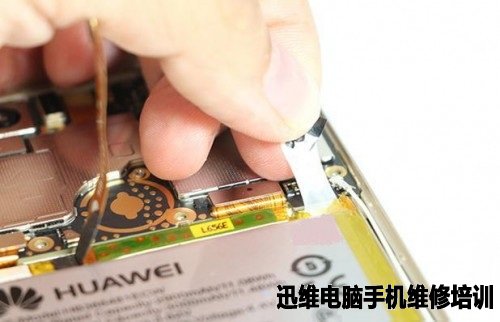
图10 荣耀8高配版拆机
荣耀8采用了一块3.82V工作电压,4.4V充电电压标准的锂离子聚合物电池,电池容量为3000mAh。

图11 荣耀8高配版拆机
在USB Type-C接口处包裹有一层橡胶,能够有效减少外界灰尘加入机身内部的情况。
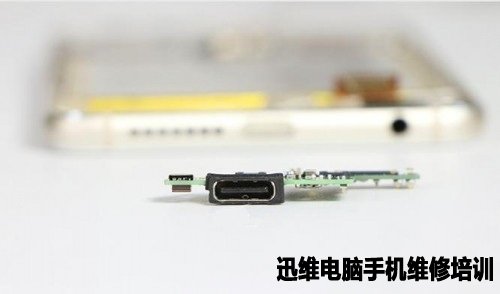
图12 荣耀8高配版拆机
回到机身顶部,荣耀8利用金属中框为芯片作屏蔽罩,使机身更薄,导热更快。同时在CPU部分也覆盖硅脂进行散热。

图13 荣耀8高配版拆机
前、后置摄像头特写:荣耀8搭载了800万像素前置摄像头,以及双1200万像素主摄像头。
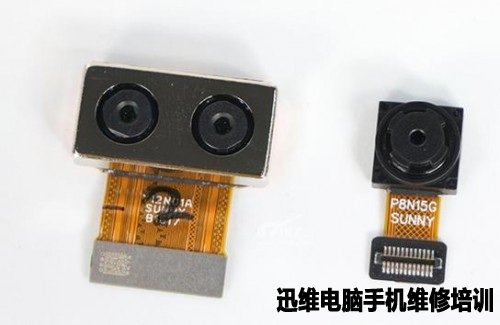
图14 荣耀8高配版拆机
配置详情:
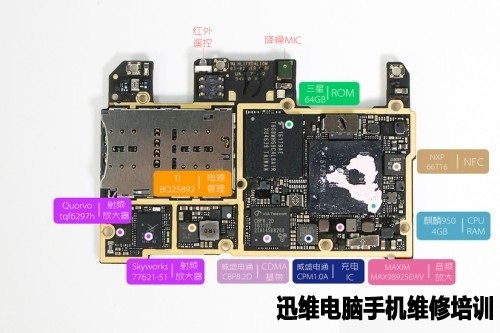
图15 荣耀8高配版拆机
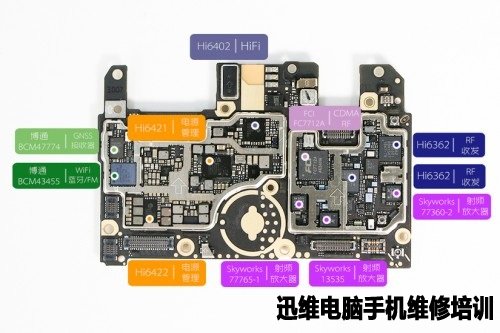
图16 荣耀8高配版拆机
集合图:
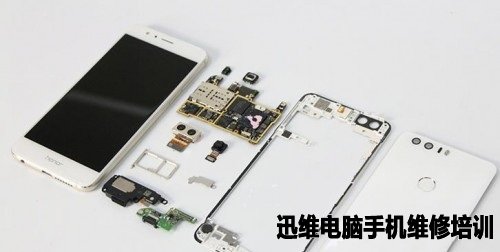
图17 荣耀8高配版拆机
荣耀8高配版拆机到此结束!
上一篇: iphone6不能拍照,拍视频正常,手电筒打不开维修一例
下一篇: 张成奕:听从内心的声音
 网站快速导航
学到熟练维修 需要多少钱?
 联系方式
联系方式

培训咨询
技术交流群
 培训科目
培训科目
- 新能源特斯拉维修培训班【实地】2026-03-17
- 无人机维修培训班【实地】2026-03-16
- 硬盘数据恢复2023-05-24
- 安卓字库修复课程(远程)2022-12-08
- 手机爆屏维修实地面授培训2021-09-02
- 自学维修基地——迅维课堂2017-06-14
- 安卓·苹果手机维修培训高级班【实地】2016-07-09
- 苹果手机、安卓手机维修培训(远程网络班)2025-12-19


