


美图T8s拆解图文教程
美图T8s是一款外观精致,用料扎实,内部设计别具一格的产品。相比美图T8,它最大的不同是配备了前置双摄像头,主打电影级的背景虚化,那么美图T8s怎么样好不好?美图T8s配置如何?美图T8s值得买吗?本文小编通过对美图T8s拆解带大家一探究竟吧。

美图T8s
先来看一下美图T8s的具体硬件参数,详情如下所示:
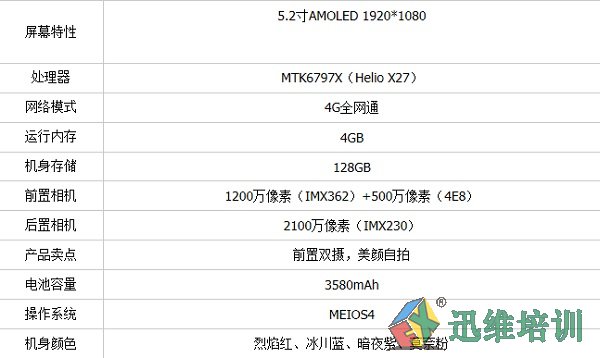
美图T8s的具体硬件参数详情
美图T8s拆解方法/过程:
首先关机、取SIM卡。

关机
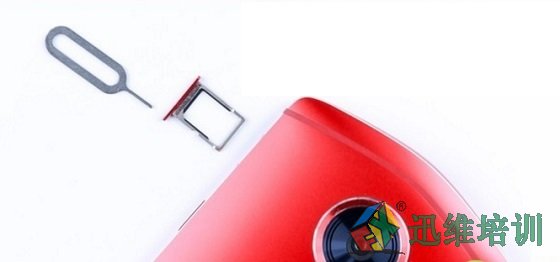
取SIM卡
拧下机身底部的两颗六角梅花螺丝。
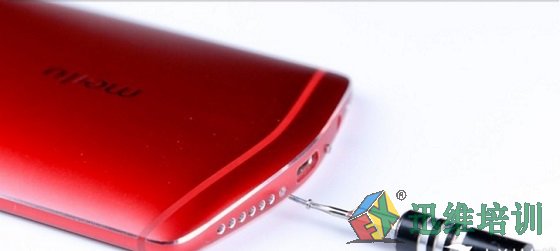
拧下底部固定螺丝
接下来利用吸盘工具将屏幕玻璃盖板掀开,利用撬片沿着边框可撬起屏幕模组与机身内部框架共同组成的模块。当撬片将机身四周的卡扣全部撬开,便可以轻松打开后盖,在掀开后盖的时候不要用力过猛,以致扯断排线。
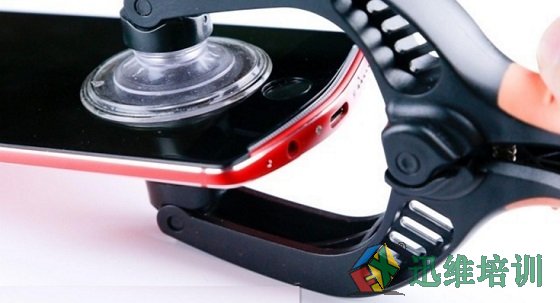
美图T8s拆解
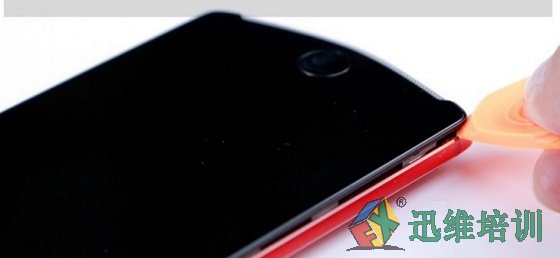
美图T8s拆解
想要断开与背壳连接的排线,需要先分离连接器上方的金属盖板,它被一颗十字螺丝固定,卸去盖板后,可见电池连接器以及数据接口连接器。
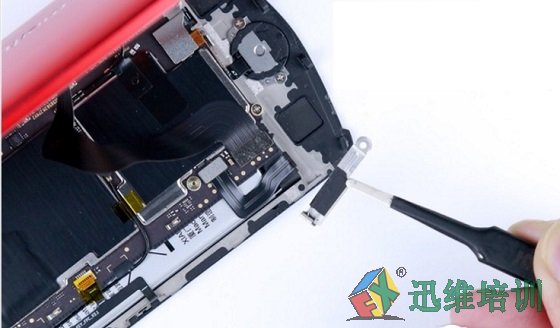
美图T8s拆解
另一条与主板连接的是同轴线,将其断开后后壳便成功分离。

断开同轴线 分离后壳
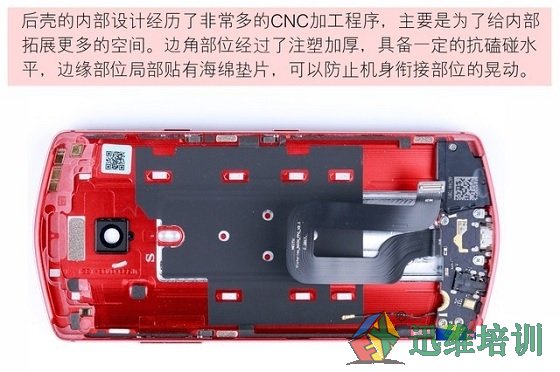
后壳特写
接下来先拆解背壳底部的模块,首先需要卸去表面的固定螺丝。
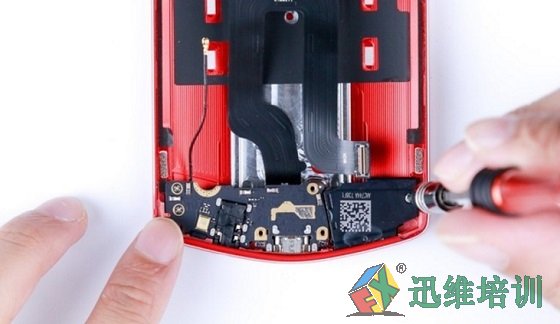
卸去国定螺丝
卸去副板表面的螺丝便可将其分离。
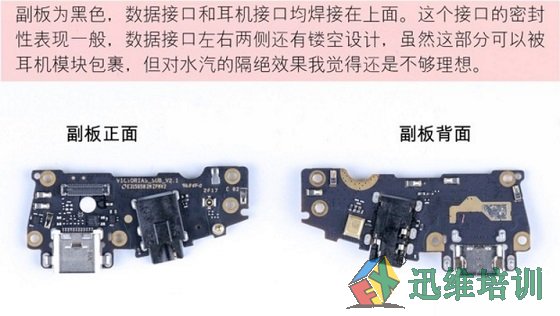
副板特写
卸去扬声器表面的唯一一颗固定螺丝就可将其分离,扬声器模块体积较大。

扬声器特写
至此机身模块拆解完毕,这种分区设计元件的方式可以提升产品装配效率。
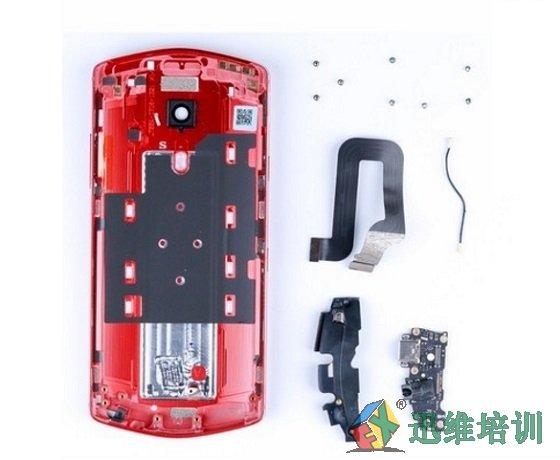
机身模块特写
接下来进入主板拆解,首先卸去底部连接器固定盖板上的螺丝,并将其盖板取下。在盖板下方可以看到触屏连接器以及home键连接器,分别将他们断开。

美图T8s拆解
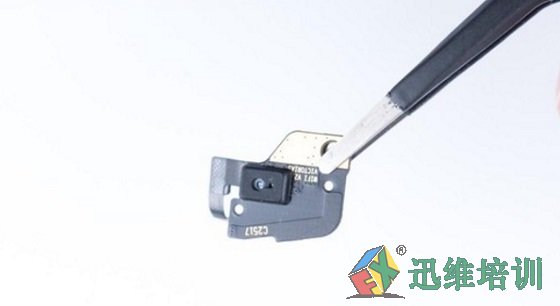
卸去home键底托两侧的十字螺丝,在底托的下面便是指纹识别home键组件。
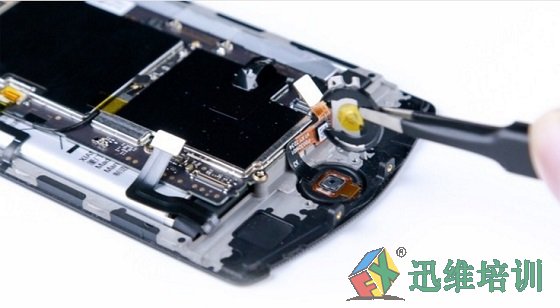
美图T8s拆解

home键组件特写
卸去主板左侧的螺丝,至此主板底部就没什么可拆的了。
顶部的拆解要复杂的很多,不仅模块众多,螺丝也多,而且还有不同的型号,所以这里每一步的拆解过程都要牢记,以免组装的时候出现差错哦。首先拆解目标最大的盖板,将其四周螺丝卸去。

美图T8s拆解
接下来断开所以的摄像头连接器,随后将他们从主板上撬起分离。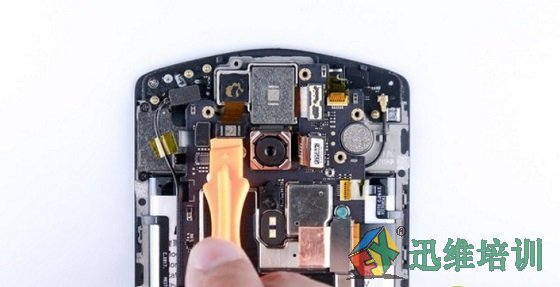
断开所以的摄像头连接器
从左到右依次是前置主摄像头,前置辅助摄像头以及后置摄像头。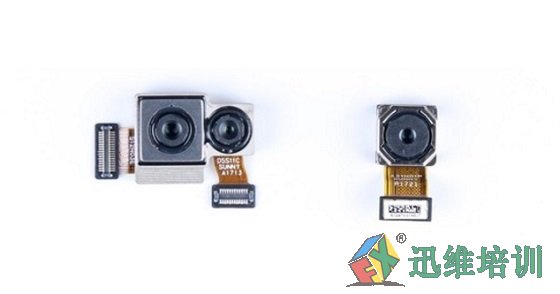
摄像头特写
断开这里的连接器,它与左侧顶部的副板相连。

美图T8s拆解
盖板下面的连接器还覆盖一层散热铜片,掀开后便可将其断开,机身顶部右侧得人副板同样通过ZIF连接器与主板相连,左侧中间部位的按键排线也是ZIF连接器。

美图T8s拆解
然后拆解同轴线,此时主板已经松动了,我们终于可以将主板从机身上取下来了。
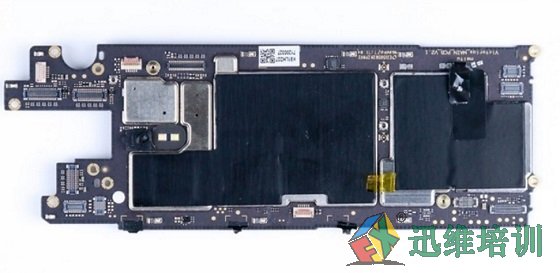
主板特写
掀开金属散热帖,几枚主要的芯片就显露出来了。我们一起来认识一下该机采用的主要芯片吧。
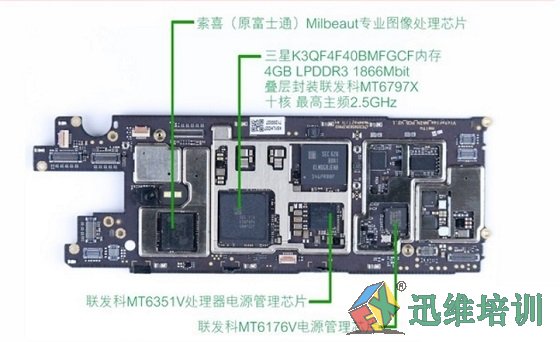
主板芯片介绍

主板芯片介绍
接下来,我们首先卸去机身右上角的天线模块螺丝,有天线模块的裸露电容进行了点胶处理。
美图T8s拆解
模块的背部还藏着该机的光线距离传感器。
光线距离传感器
利用尖嘴镊子从底部铲出振动器模块。
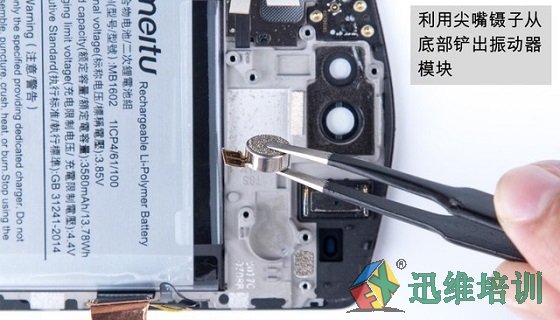
振动器模块特写
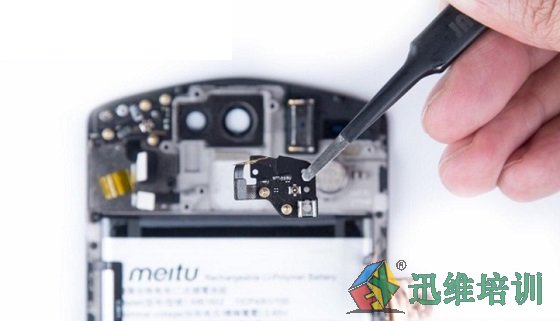
最后,分离电池环节,首先将电池的四周胶贴全部掀开,接着提起电池右侧的塑料提手,用力往上拽,便可将电池卸去,背部胶的黏性适中,所以较为好拆。

电池容量为2580mAh

美图T8s拆解全家福
总的来说,美图T8s是一款足够特别的产品,它的这种特别不仅仅是外观给人的耳目一新,而是以标新立异的内部设计才得以实现的。它的硬件设计基本功也同样扎实,并非为了迎合大众口味而推出浮躁产品。我甚至怀疑,美图是不是邀请了HTC的设计师参与了设计。
下一篇: 手机维修培训班学员考核未过遭“体罚”
 网站快速导航
学到熟练维修 需要多少钱?
 联系方式
联系方式

培训咨询
技术交流群
 培训科目
培训科目
- 新能源特斯拉维修培训班【实地】2026-03-17
- 无人机维修培训班【实地】2026-03-16
- 硬盘数据恢复2023-05-24
- 安卓字库修复课程(远程)2022-12-08
- 手机爆屏维修实地面授培训2021-09-02
- 自学维修基地——迅维课堂2017-06-14
- 安卓·苹果手机维修培训高级班【实地】2016-07-09
- 苹果手机、安卓手机维修培训(远程网络班)2025-12-19


