


兄弟打印机7060D打印页面有残影,更换定影膜过程
【机器型号】兄弟7060D打印机
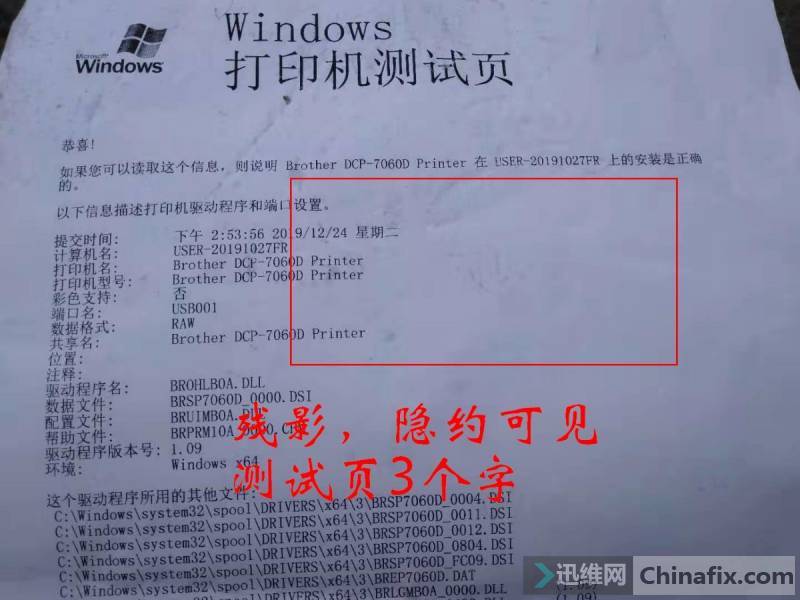
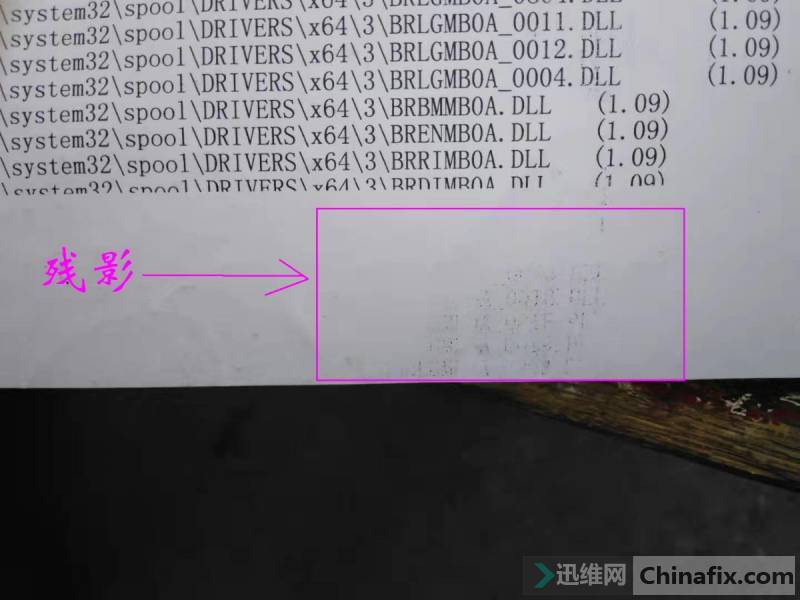
【故障现象】打印页面有残影(上一张的残影)
兄弟打印机7060D打印页面有残影1
兄弟打印机7060D打印页面有残影2
【维修过程】
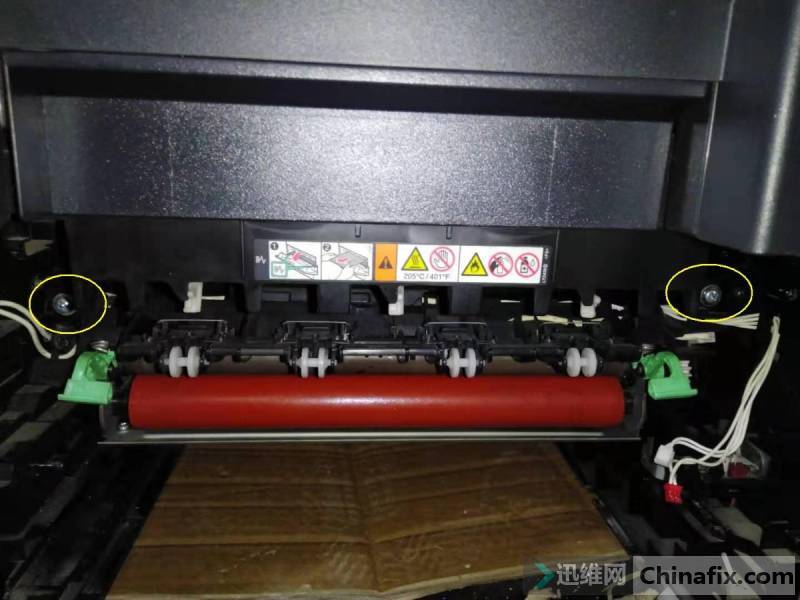
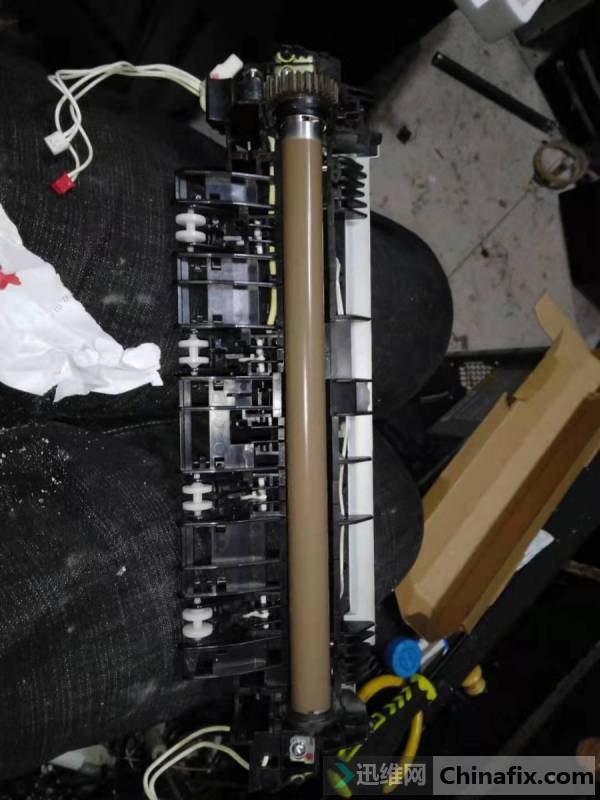
打印测试,打印页面有上一张的残影,更换硒鼓无效。打开后盖,定影上辊上面,有大面积的积碳,只能更换定影膜。
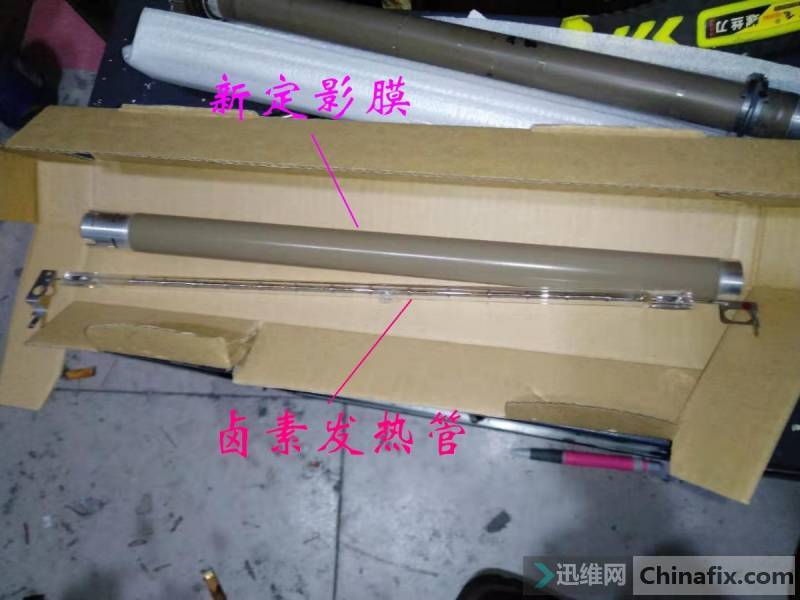
莱盛定影上辊一根。东西不贵,主要成本在工时。
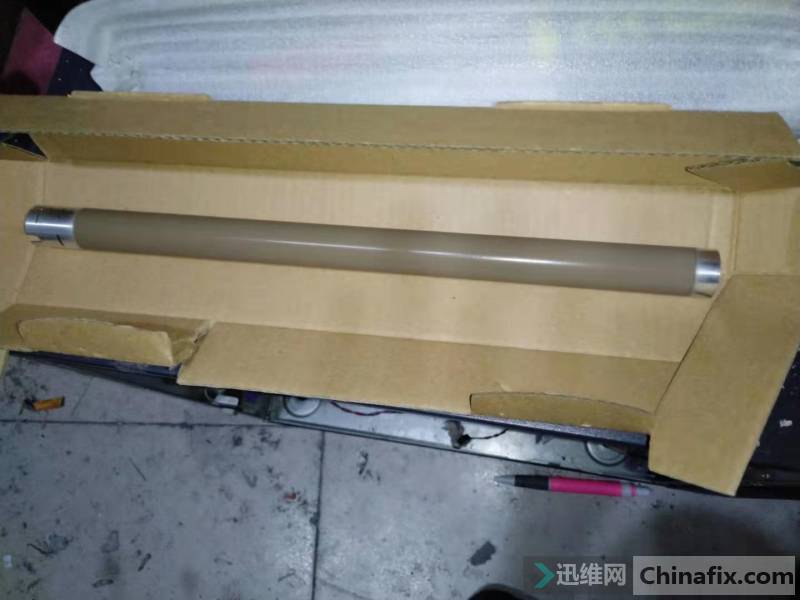
兄弟打印机7060D 定影膜
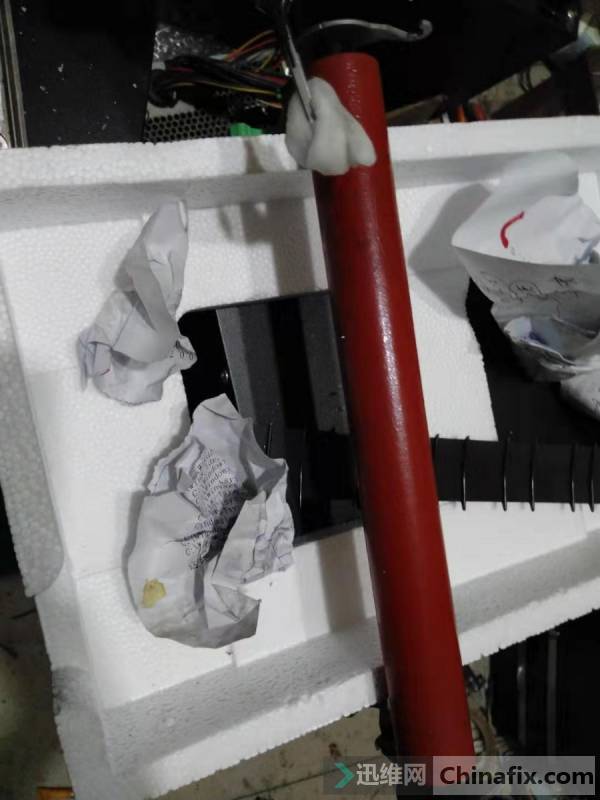
拆卸定影单元。过程太繁琐,安装定影膜,非常考验人的耐心,细心和条理性。
直接拆,只需要卸掉左侧盖和后盖。后盖上面一堆塑料件,全部拆下。
兄弟打印机7060D更换定影膜 图1
线插3个,左侧一个白色大插头,右侧红白2个,都摘掉。
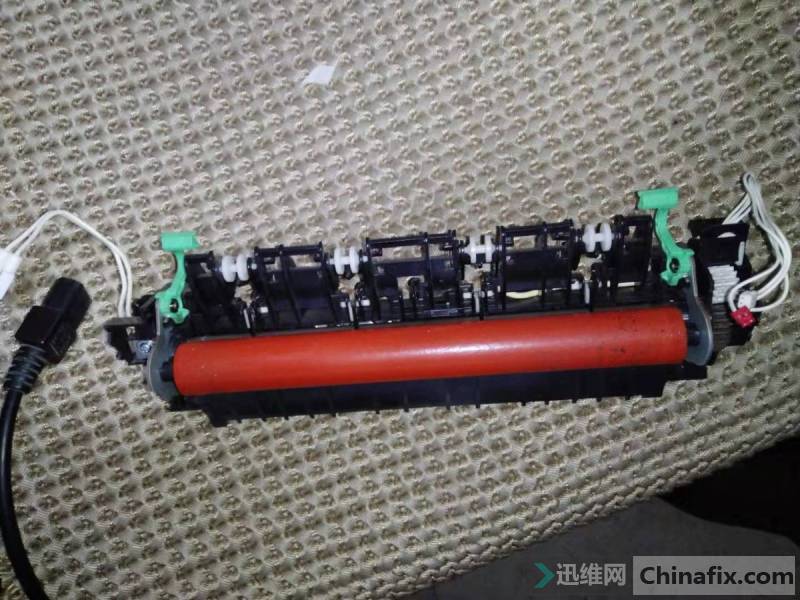
兄弟打印机7060D更换定影膜 图2
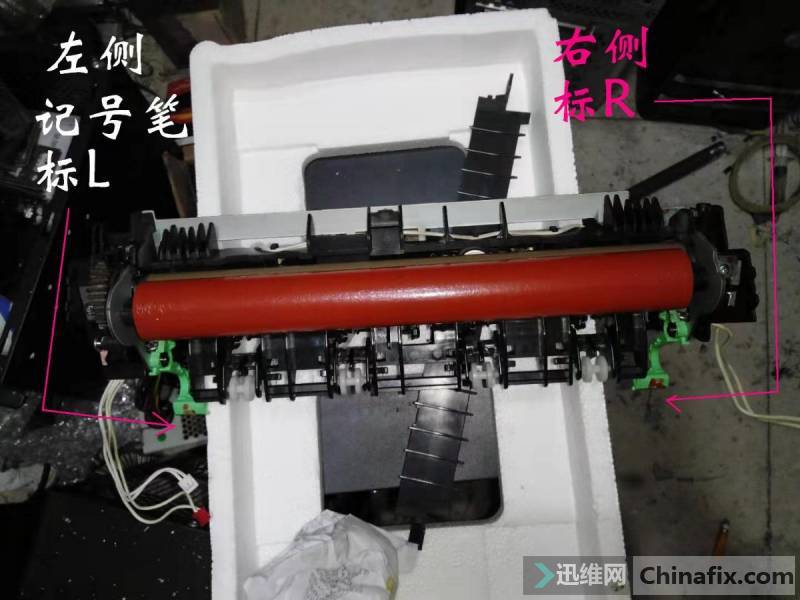
拆卸之前,先找个记号笔,做标注。(我的经验,宁可标注多余了,也比在脑子里回忆强得多。)
兄弟打印机7060D更换定影膜 图3
绿卡子上标L R,右侧的零件,画圆点,左侧写L。
兄弟打印机7060D更换定影膜 图4
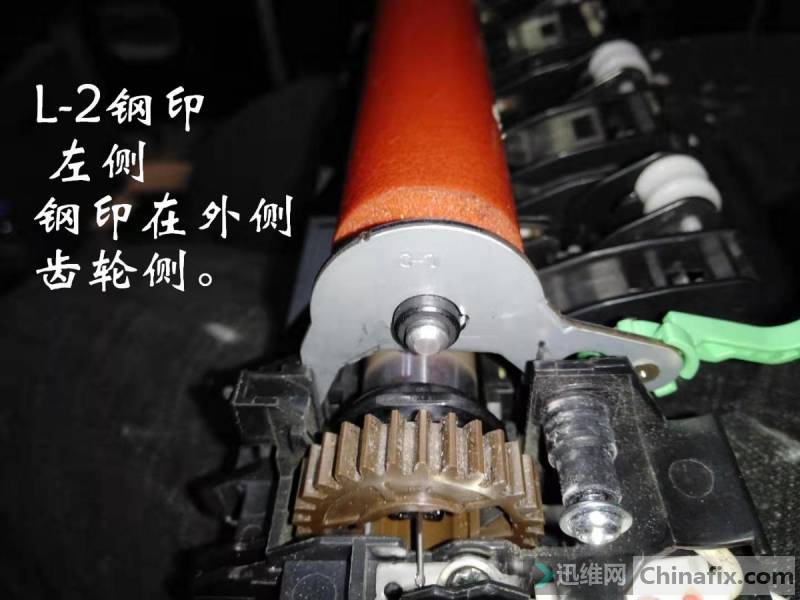
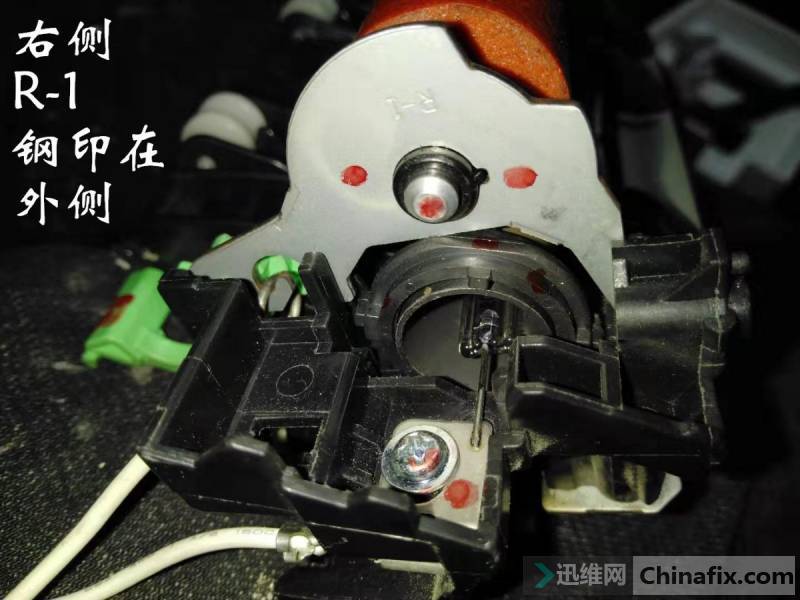
左右侧,可以从上辊圆钢片上区分,上面打得有钢印。
这里一共有4个方位:
左右 内外
左外侧,左内侧
右外侧,右内侧
按这个定位,做好记号。可以原封不动装回。甚至连一颗螺钉都不会装错。
兄弟打印机7060D更换定影膜 图5
上辊轴,卤素管,螺钉,都点了圆点。这样拆散了,可以原封不动装回。总之,宁可标多余了,也不要少标。
兄弟打印机7060D更换定影膜 图6
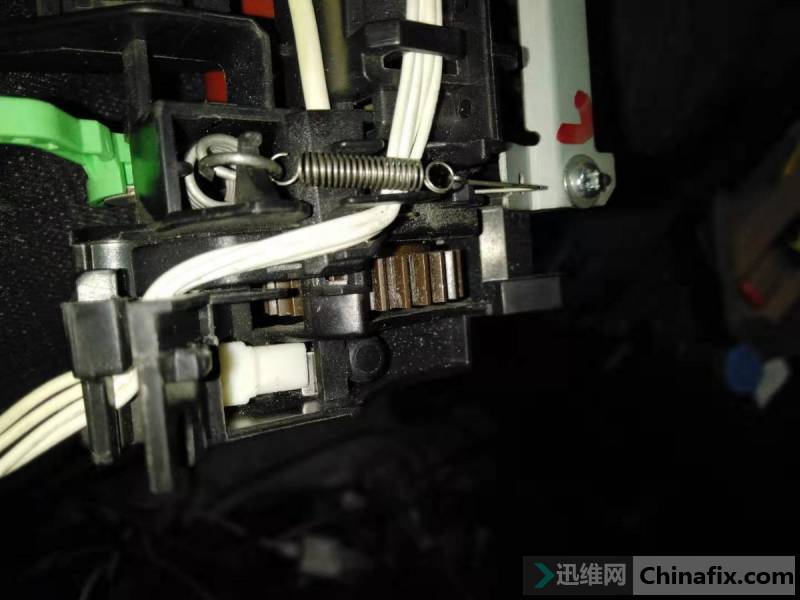
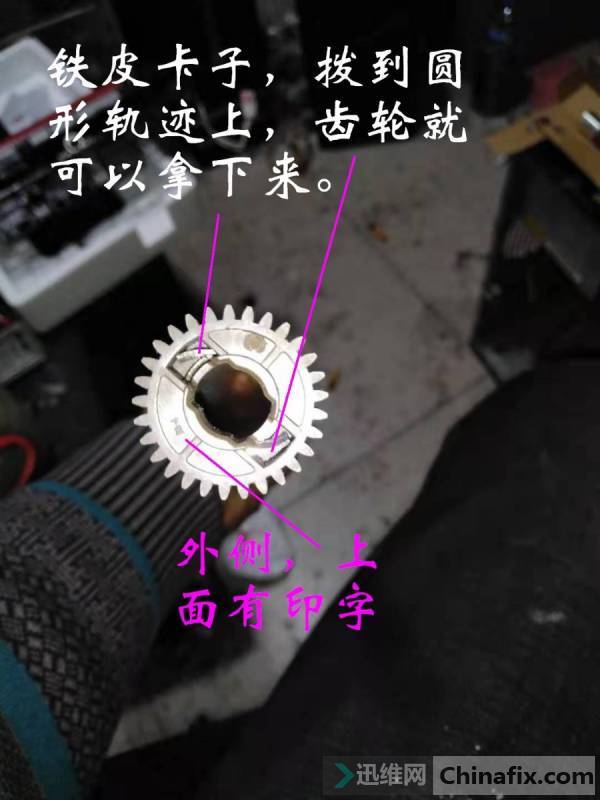
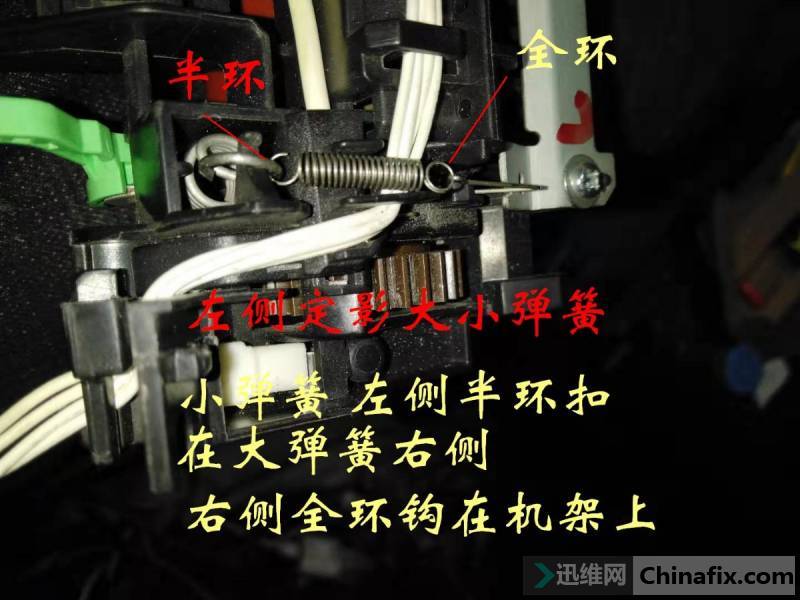
上辊:弹簧卸掉,左侧2个,1大1小,右侧1大。
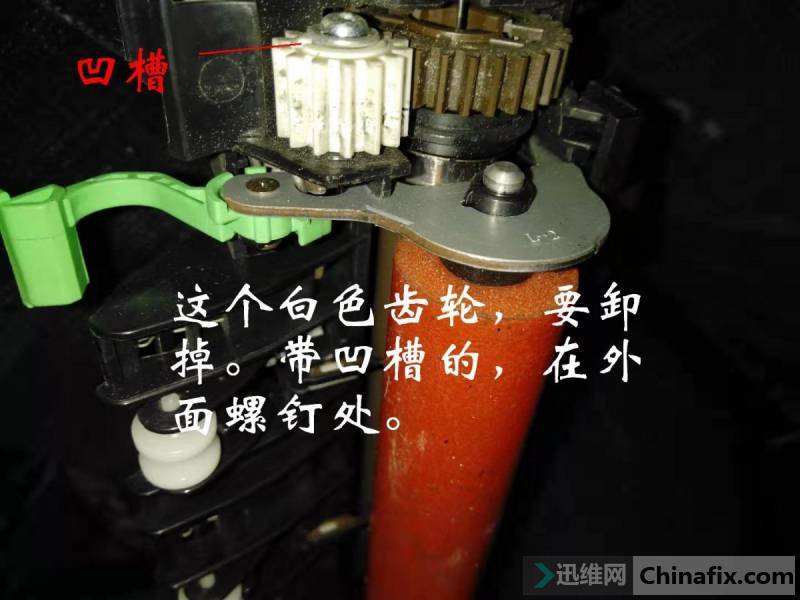
兄弟打印机7060D更换定影膜 图7
兄弟打印机7060D更换定影膜 图8
上辊:定影膜上面的积碳导致的残影。

兄弟打印机7060D更换定影膜 图9
兄弟打印机7060D更换定影膜 图10
兄弟打印机7060D更换定影膜 图11
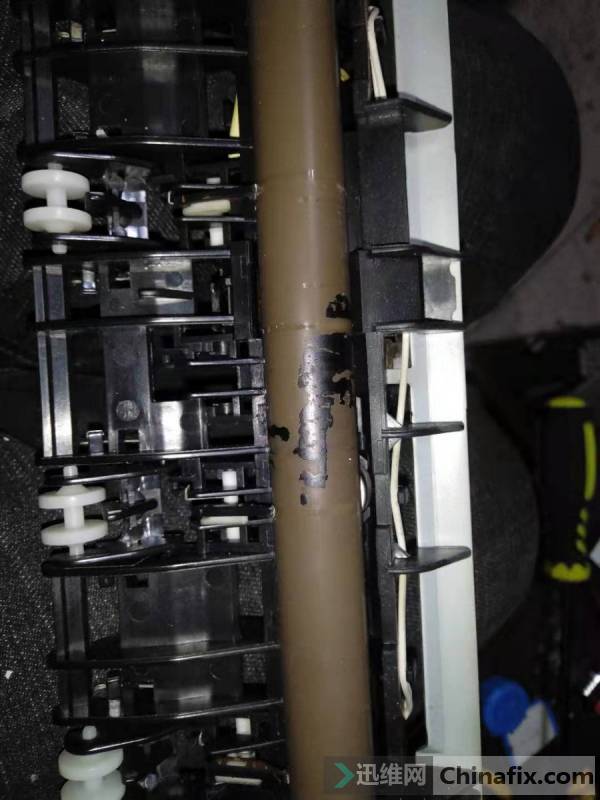
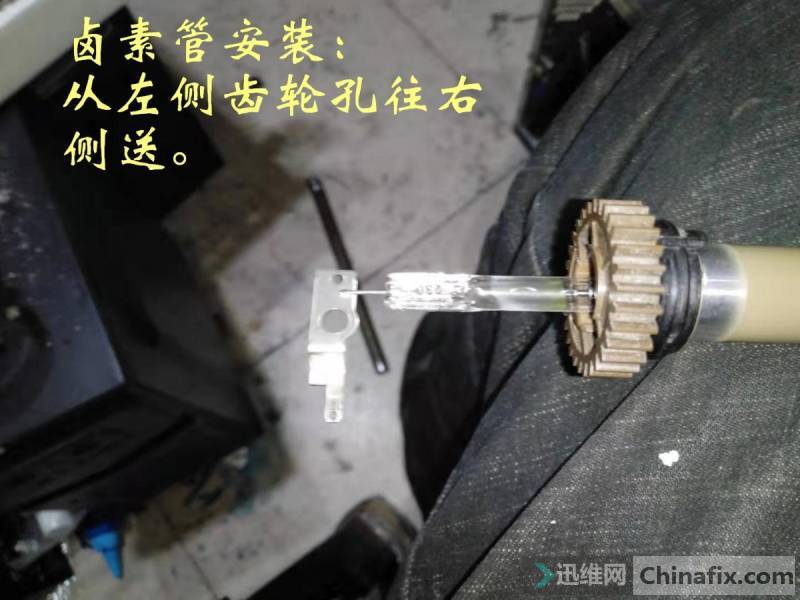
卤素发热管不要弄碎了,是个玻璃的。
兄弟打印机7060D更换定影膜 图12
强迫症可以照这个图安装,保证和原装一模一样。
兄弟打印机7060D更换定影膜 图13

兄弟打印机7060D更换定影膜 图14
扣大弹簧,是最困难的。需要细心耐心。卤素管两端线缆是卡扣式的,直接扣上。
兄弟打印机7060D更换定影膜 图15
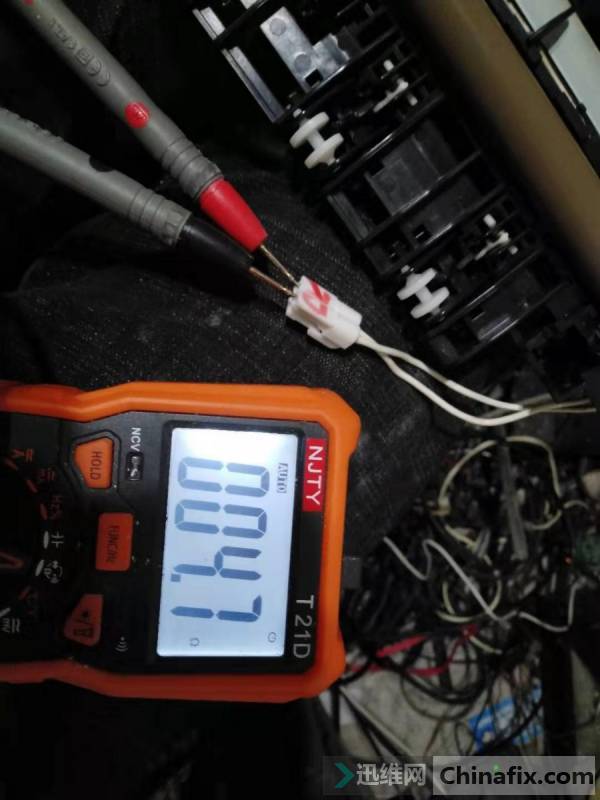
扣上后,用万用表测量一下,4.7欧。
兄弟打印机7060D更换定影膜 图16
下辊:用酒精清洗一下,上面也有积碳。
兄弟打印机7060D更换定影膜 图17
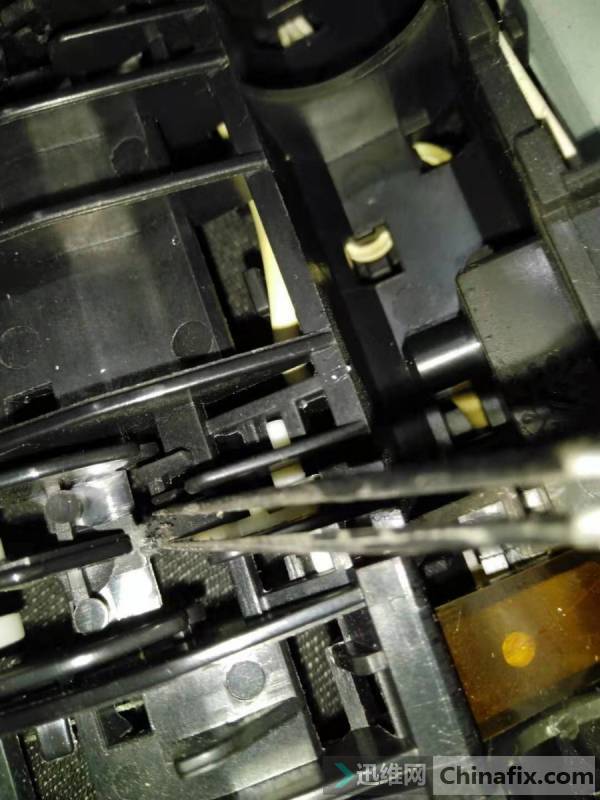
分离爪上面积碳,用镊子清理掉。
兄弟打印机7060D更换定影膜 图18
【故障现象】打印页面有残影(上一张的残影)
兄弟打印机7060D打印页面有残影1
兄弟打印机7060D打印页面有残影2
打印测试,打印页面有上一张的残影,更换硒鼓无效。打开后盖,定影上辊上面,有大面积的积碳,只能更换定影膜。
莱盛定影上辊一根。东西不贵,主要成本在工时。
兄弟打印机7060D 定影膜
拆卸定影单元。过程太繁琐,安装定影膜,非常考验人的耐心,细心和条理性。
直接拆,只需要卸掉左侧盖和后盖。后盖上面一堆塑料件,全部拆下。
兄弟打印机7060D更换定影膜 图1
线插3个,左侧一个白色大插头,右侧红白2个,都摘掉。
兄弟打印机7060D更换定影膜 图2
拆卸之前,先找个记号笔,做标注。(我的经验,宁可标注多余了,也比在脑子里回忆强得多。)
兄弟打印机7060D更换定影膜 图3
绿卡子上标L R,右侧的零件,画圆点,左侧写L。
兄弟打印机7060D更换定影膜 图4
左右侧,可以从上辊圆钢片上区分,上面打得有钢印。
这里一共有4个方位:
左右 内外
左外侧,左内侧
右外侧,右内侧
按这个定位,做好记号。可以原封不动装回。甚至连一颗螺钉都不会装错。
兄弟打印机7060D更换定影膜 图5
上辊轴,卤素管,螺钉,都点了圆点。这样拆散了,可以原封不动装回。总之,宁可标多余了,也不要少标。
兄弟打印机7060D更换定影膜 图6
上辊:弹簧卸掉,左侧2个,1大1小,右侧1大。
兄弟打印机7060D更换定影膜 图7
兄弟打印机7060D更换定影膜 图8
上辊:定影膜上面的积碳导致的残影。
兄弟打印机7060D更换定影膜 图9
兄弟打印机7060D更换定影膜 图10
兄弟打印机7060D更换定影膜 图11
卤素发热管不要弄碎了,是个玻璃的。
兄弟打印机7060D更换定影膜 图12
强迫症可以照这个图安装,保证和原装一模一样。
兄弟打印机7060D更换定影膜 图13
兄弟打印机7060D更换定影膜 图14
扣大弹簧,是最困难的。需要细心耐心。卤素管两端线缆是卡扣式的,直接扣上。
兄弟打印机7060D更换定影膜 图15
扣上后,用万用表测量一下,4.7欧。
兄弟打印机7060D更换定影膜 图16
下辊:用酒精清洗一下,上面也有积碳。
兄弟打印机7060D更换定影膜 图17
分离爪上面积碳,用镊子清理掉。
兄弟打印机7060D更换定影膜 图18
装回后,开机测试,故障排除,打印正常了。
 网站快速导航
学到熟练维修 需要多少钱?
 联系方式
联系方式

培训咨询
技术交流群
 培训科目
培训科目
- 新能源特斯拉维修培训班【实地】2026-03-17
- 无人机维修培训班【实地】2026-03-16
- 硬盘数据恢复2023-05-24
- 安卓字库修复课程(远程)2022-12-08
- 手机爆屏维修实地面授培训2021-09-02
- 自学维修基地——迅维课堂2017-06-14
- 安卓·苹果手机维修培训高级班【实地】2016-07-09
- 苹果手机、安卓手机维修培训(远程网络班)2025-12-19


